Enable Google Calendar Sync (for the whole organization)
This requires the Account Administrator role.
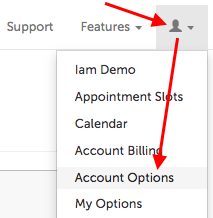
1. Click on the profile icon and select "Account Options".
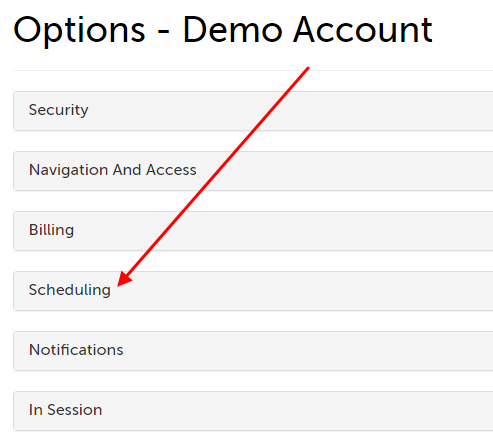
2. Click "Scheduling" to expand that section.
3. Scroll to the option "Enable Google Calendar Integration" and set this to "Yes" or "No". The change will save automatically.
- If "Yes" is selected, then all licensed users in this organization will be able to link a Google Calendar to their SecureVideo account from their profile page (see section, Link Your Google Calendar).
- If "No" is selected, then licensed users in this organization will not see the option to link a Google Calendar to their SecureVideo account from their profile page.
- "Can Users Override?"
- If this setting is set to "No", then non-Account Administrator users will not be able to enable this option for themselves.
- If this setting is set to "Yes", then any licensed user in this organization can enable this option for themselves; see section, Enable Google Calendar Sync (for an individual user).

Enable Google Calendar Sync (for an individual user)
Enable Google Calendar Sync: For yourself
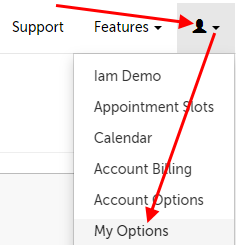
1. Click on the profile icon in the upper right hand corner and select "My Options".
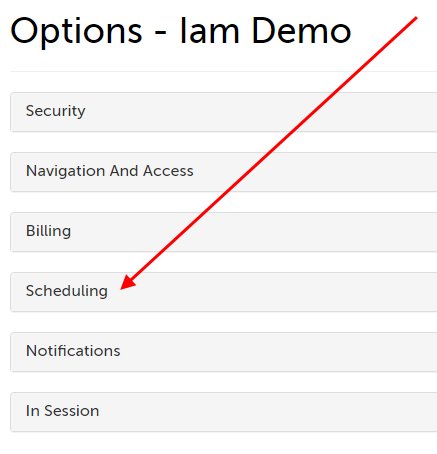
2. Click "Scheduling" to expand that section.
3. Scroll to the option "Enable Google Calendar Integration" and set this to "Yes" or "No". The change will save automatically.
- If "Yes" is selected, then all licensed users in this organization will be able to link a Google Calendar to their SecureVideo account from their profile page (see section, Link Your Google Calendar).
- If "No" is selected, then licensed users in this organization will not see the option to link a Google Calendar to their SecureVideo account from their profile page.

Enable Google Calendar Sync: For another user in the organization
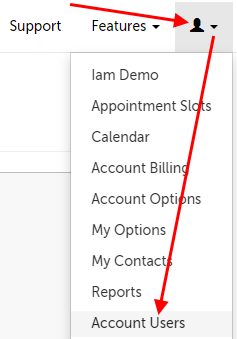
1. Click on the profile icon in the upper right hand corner and select "Account Users".
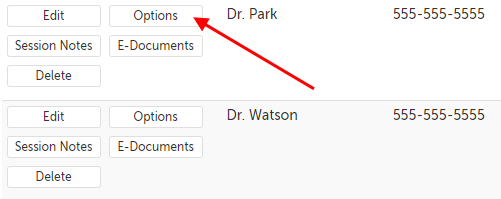
2. Click the "Options" button next to the licensed user you want to enable this setting for.
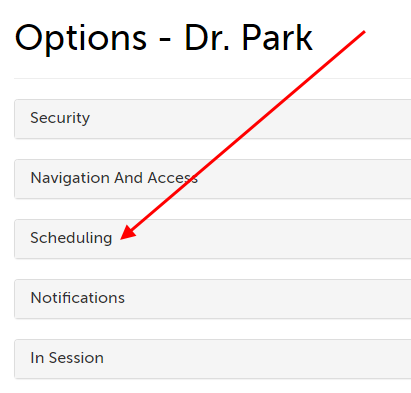
3. Click "Scheduling" to expand that section.
4. Scroll to the option "Enable Google Calendar Integration" and set this to "Yes" or "No". The change will save automatically.
- If "Yes" is selected, then this user will be able to link a Google Calendar to their SecureVideo account from their profile page (see section, Link Your Google Calendar). Any sessions that is hosted by this user will be
- If "No" is selected, then licensed users in this organization will not see the option to link a Google Calendar to their SecureVideo account from their profile page.

Link your Google Calendar
You will need to be logged into your Google account already or be ready to log into your Google account.
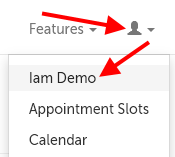
1. Click on the Profile icon in the upper right-hand corner, and select the first item from the dropdown menu (your current user name). In the example below, the current user's name is "Iam Demo".
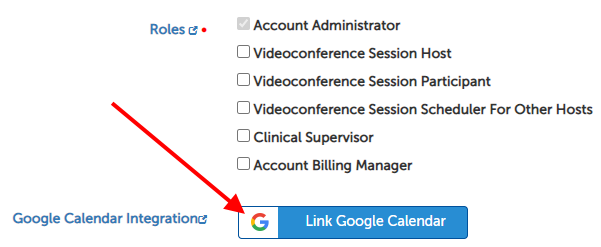
2. Scroll to the bottom of the page (below the Roles section) and click the "Link Google Calendar" button.
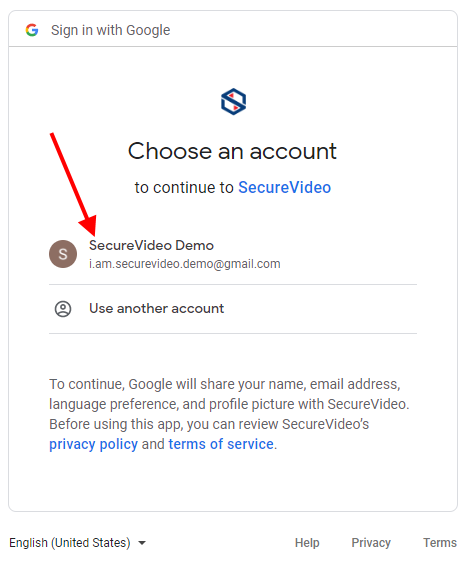
3. Select the Google account you want to link to your SecureVideo account.
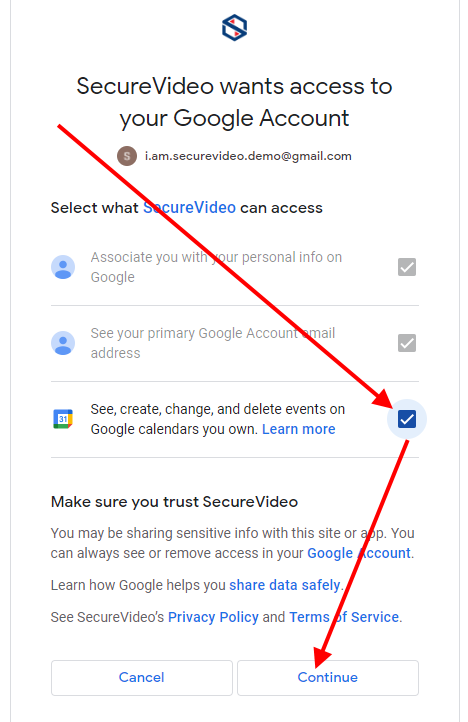
4. On the permissions prompt, check the box next to "See, create, change, and delete events on Google calendars you own". Then click "Continue".
- NOTE: If you do not check the box granting permission to see, create, change, and delete events on your calendar, then this integration will not work.
5. The Google window will close, and on your profile page, you'll see an unlink button. This will confirm that the linking is complete. Any active sessions that you have in SecureVideo (that you are the host for) will be copied automatically to your Google Calendar.
- Note: if you have sessions on your dashboard that you are NOT the host for, these will not be copied to your Google Calendar.

View linked Google Calendar events in your SecureVideo calendar
1. To navigate to your SecureVideo calendar, click on the profile icon and select "Calendar".
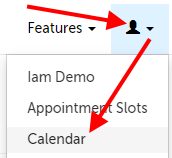
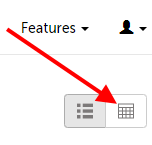
Or, if you are on your dashboard, click on the calendar icon near the upper right hand corner.
2. The events on your calendar will be different colors accordings to the type of event they are. You can reference the color legend at the top of the page.

- SecureVideo sessions will be shown in your branding's primary button color.
- Recurring sessions scheduled to be created will be shown in your branding's secondary button color.
- Events copied from your Google Calendar will appear in pea green.
If you click on a SecureVideo session event, it will take you to the dashboard and scroll down to that session.
If you click on a Google Calendar event, it will take you to Google Calendar and open that event. Press the back button to return to SecureVideo.
Unlink your Google Calendar
1. Click on the Profile icon in the upper right-hand corner, and select the first item from the dropdown menu (your current user name). In the example below, the current user's name is "Iam Demo".

2. Scroll down to the bottom of the page, and click the "Unlink" button. This will unlink your Google Calendar from SecureVideo. All SecureVideo session events that were created on the Google Calendar as a result of the link will be removed once the calendar has been unlinked from SecureVideo.

3. To complete the process, you will want to delete the permissions on Google's end as well. Go to myaccount.google.com and click on the "Go to Google Account" button in the upper right hand corner. On the next page, you will be prompted to log into your Google account if you are not already logged in.

4. After logging in (or if you are already logged in), click on the "Security" option on the left hand sidebar. This will change what appears on the right hand side. Scroll down until you see the section for "Third-party apps with account access." Click on the"Manage third-party access" link.

5. On the next page, find and click "SecureVideo" on the list of third-party apps.
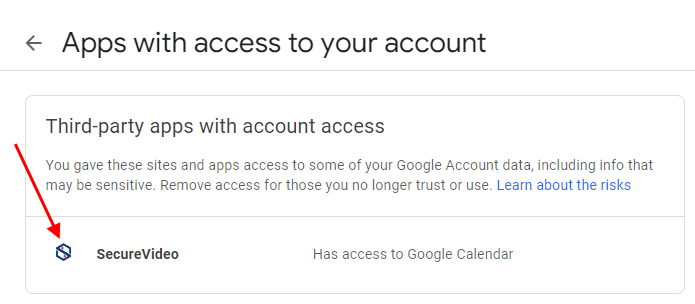
6. This will expand that section. Click the "Remove Access" button that appears.

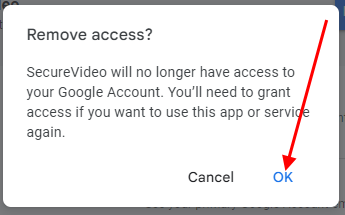
7. Click "OK" on the confirmation message to confirm removing access. SecureVideo should disappear from the list of third-party apps.
This article was last reviewed by our Support team on August 29 2022.