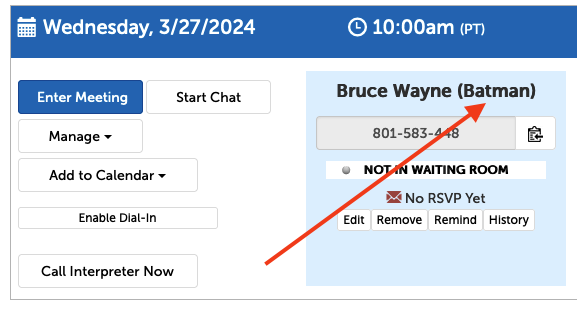
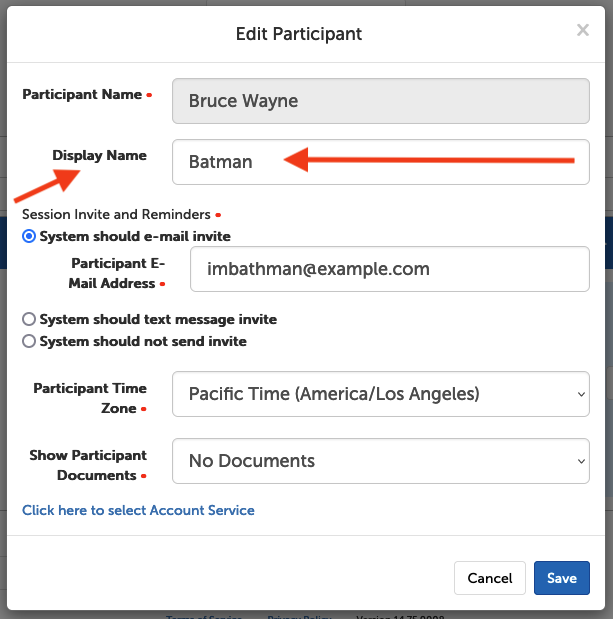
Display Names are useful in group settings where your participants shouldn’t see other participants' names in the group video (or chat) session. By adding this new name field that we’re calling “Display Names”, the system allows accurate contact names to be entered while ensuring that your participants only see the participant name that you choose to display.
 .
. 
Enabling Display Names for your account
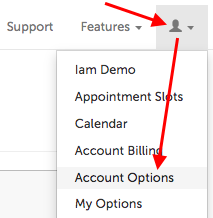
1. Click on the profile icon in the upper right-hand corner, and select "Account Options" from the drop-down menu. (If you're not an Admin you may instead select "My Options")
2. Click the Scheduling tab and search for "Use Display Names for Contacts".
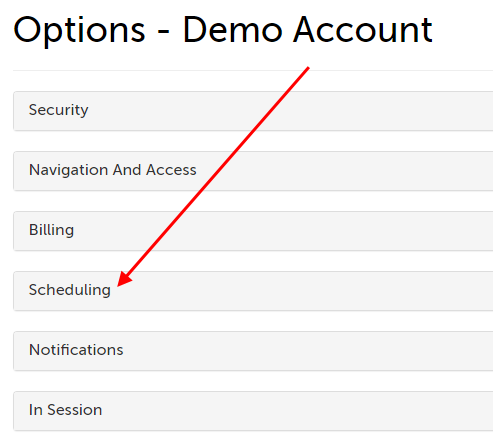
3. Change the account setting from "No" to "Yes"

Adding a Display Name when scheduling a session
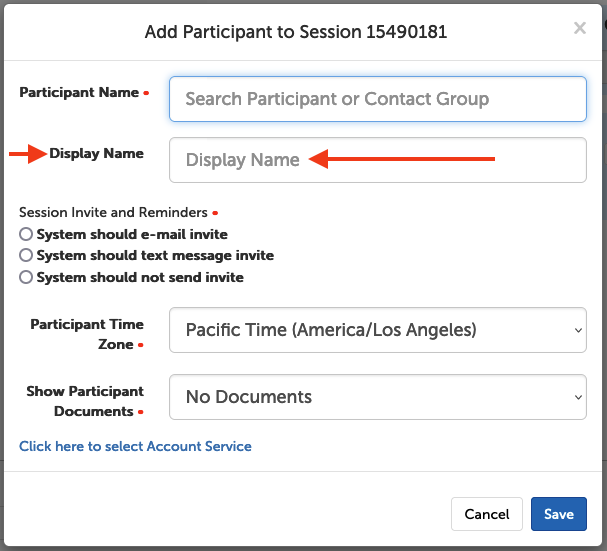
1. On the Dashboard, use the scheduling buttons and select either "New Session Now" or "New Scheduled Session"

2. Upon adding participant details you will see the new field to add a Display Name
Adding a Display Name when editing a session
1. To add or change a Display Name on an existing session participant, you can click "Edit" at the bottom of their participant panel.
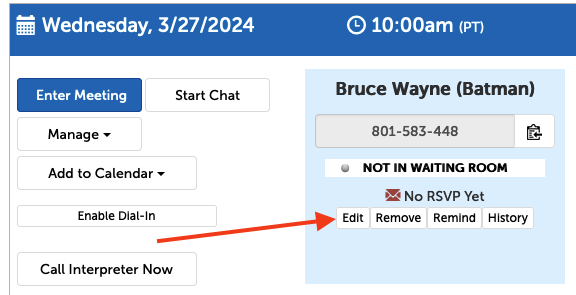
2. This will pull up your participant's information where you will be able to make changes.
Adding a Display Name when creating or editing a contact
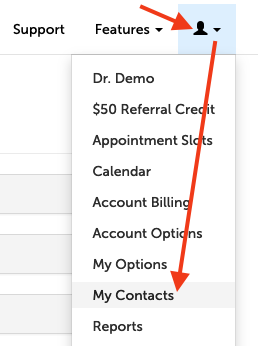
1. Once Display Names have been enabled for your account, click the profile icon in the upper right-hand corner and select "My Contacts" from the drop-down menu.
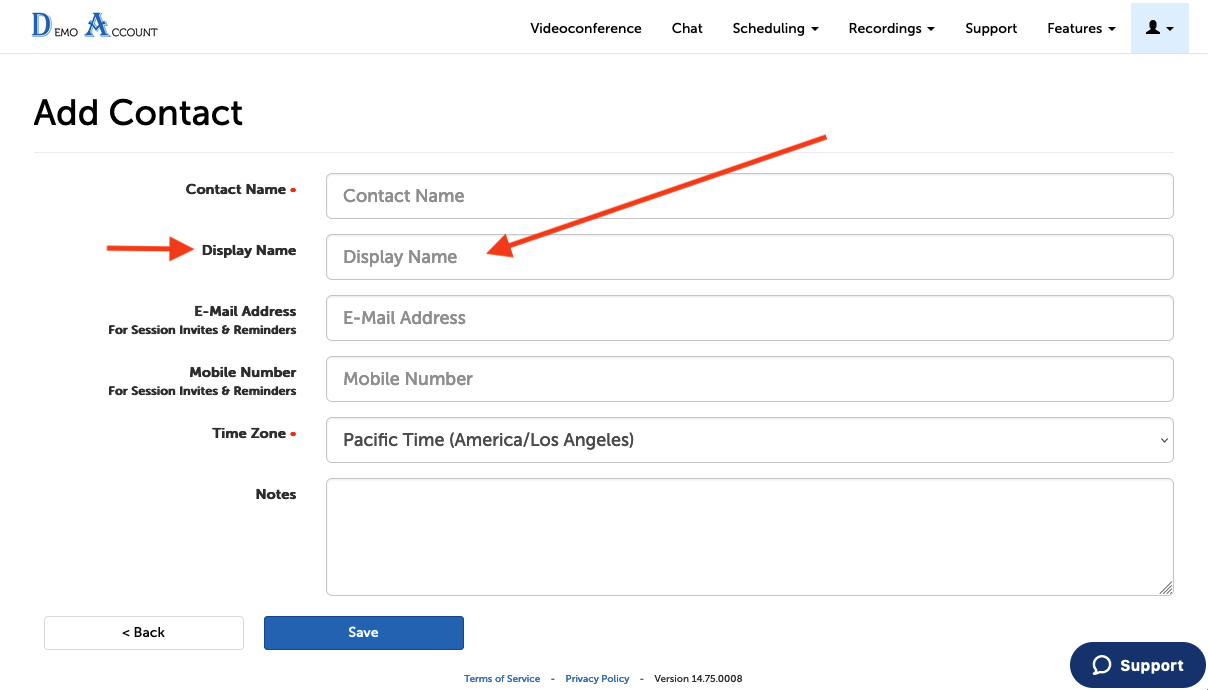
2. Select either "Create New Contact" or "Edit"

3. There you will find the new name field where you can add a Display Name to a completely new contact or an existing one.
4. After pressing "Save" you will see the Display Names saved to a new column.

Adding or changing a Display Name from the Contacts page will automatically apply to existing sessions on the Dashboard.
This article was last reviewed by our Support team on March 22, 2024.